'Programming Language/아두이노, 라즈베리파이'에 해당되는 글 17건

  1. 2024.01.08 광센서 CdS Cell (GL7528)/Light Sensor
  2. 2024.01.08 DHT11 온습도 센서모듈 [SZH-EK024]
  3. 2024.01.08 
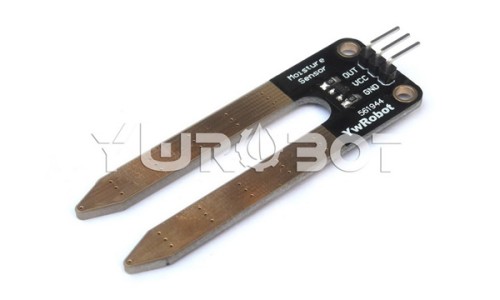
Soil Moisture Sensor Module [SEN030003]
  4. 2024.01.08 MOLEX 커넥터 : Wire to Board
728x90

판매사이트 : https://www.devicemart.co.kr/


PDF: 센서 스펙

D7-CdS-e.pdf
0.26MB


analogRead()
Description


Reads the value from the specified analog pin. The Arduino board contains a 6 channel (8 channels on the Mini and Nano, 16 on the Mega), 10-bit analog to digital converter. This means that it will map input voltages between 0 and 5 volts into integer values between 0 and 1023. This yields a resolution between readings of: 5 volts / 1024 units or, .0049 volts (4.9 mV) per unit. The input range and resolution can be changed using analogReference().


It takes about 100 microseconds (0.0001 s) to read an analog input, so the maximum reading rate is about 10,000 times a second.


Syntax


analogRead(pin)


Parameters


pin: the number of the analog input pin to read from (0 to 5 on most boards, 0 to 7 on the Mini and Nano, 0 to 15 on the Mega)


Returns


int (0 to 1023)
analogWrite()


Description


Writes an analog value (PWM wave) to a pin. Can be used to light a LED at varying brightnesses or drive a motor at various speeds. After a call to analogWrite(), the pin will generate a steady square wave of the specified duty cycle until the next call to analogWrite() (or a call to digitalRead() or digitalWrite() on the same pin). The frequency of the PWM signal on most pins is approximately 490 Hz. On the Uno and similar boards, pins 5 and 6 have a frequency of approximately 980 Hz. Pins 3 and 11 on the Leonardo also run at 980 Hz.


On most Arduino boards (those with the ATmega168 or ATmega328), this function works on pins 3, 5, 6, 9, 10, and 11. On the Arduino Mega, it works on pins 2 - 13 and 44 - 46. Older Arduino boards with an ATmega8 only support analogWrite() on pins 9, 10, and 11.


The Arduino Due supports analogWrite() on pins 2 through 13, plus pins DAC0 and DAC1. Unlike the PWM pins, DAC0 and DAC1 are Digital to Analog converters, and act as true analog outputs.


You do not need to call pinMode() to set the pin as an output before calling analogWrite().


The analogWrite function has nothing to do with the analog pins or the analogRead function.


Syntax


analogWrite(pin, value)


Parameters


pin: the pin to write to.


value: the duty cycle: between 0 (always off) and 255 (always on).
analogReference() : Configures the reference voltage used for analog input. (default: 5V)
analogReadResolution() is an extension of the Analog API for the Arduino Due and Zero.
analogWriteResolution() is an extension of the Analog API for the Arduino Due and Zero.


728x90
Posted by 하루y
728x90


저전력이며, 오랜 사용에도 안정적이고 보정된 디지털 신호를 출력하는 제품으로, 보정용 8비트 마이크로컨트롤러가 센서내에 통합되어 있어 정교한 온도 측정을 제공합니다.


정격 전압: +5 V (3.5V~5.5VDC)


온도 범위 :0-50 °C ± 2 °C


습도 범위 :20-90% RH ± 5%

# 모듈 형식이라서, 다른 저항 없이 바로 아두이노에 연결해도 동작 잘 됨.


# 샘플코드

아두이노IDE에서 "DHT sensor Library"추가 후,

소스중에 DHT_U.h, DHT_U.cpp 파일 제거 후 예제 컴파일. 해당 소스에 제조사 관련 헤더파일 때문에 오류남. 없어되 되는 소스라 삭제.

// Example testing sketch for various DHT humidity/temperature sensors
// Written by ladyada, public domain

#include "DHT.h"

#define DHTPIN 2     // what digital pin we're connected to

// Uncomment whatever type you're using!
#define DHTTYPE DHT11   // DHT 11
//#define DHTTYPE DHT22   // DHT 22  (AM2302), AM2321
//#define DHTTYPE DHT21   // DHT 21 (AM2301)

// Connect pin 1 (on the left) of the sensor to +5V
// NOTE: If using a board with 3.3V logic like an Arduino Due connect pin 1
// to 3.3V instead of 5V!
// Connect pin 2 of the sensor to whatever your DHTPIN is
// Connect pin 4 (on the right) of the sensor to GROUND
// Connect a 10K resistor from pin 2 (data) to pin 1 (power) of the sensor

// Initialize DHT sensor.
// Note that older versions of this library took an optional third parameter to
// tweak the timings for faster processors.  This parameter is no longer needed
// as the current DHT reading algorithm adjusts itself to work on faster procs.
DHT dht(DHTPIN, DHTTYPE);

void setup() {
  Serial.begin(9600);
  Serial.println("DHTxx test!");

  dht.begin();
}

void loop() {
  // Wait a few seconds between measurements.
  delay(2000);

  // Reading temperature or humidity takes about 250 milliseconds!
  // Sensor readings may also be up to 2 seconds 'old' (its a very slow sensor)
  float h = dht.readHumidity();
  // Read temperature as Celsius (the default)
  float t = dht.readTemperature();

  // Check if any reads failed and exit early (to try again).
  if (isnan(h) || isnan(t)) {
    Serial.println("Failed to read from DHT sensor!");
    return;
  }

  Serial.print("Humidity: ");
  Serial.print(h);
  Serial.print(" %\t");
  Serial.print("Temperature: ");
  Serial.print(t);
  Serial.println(" *C ");
}
728x90
Posted by 하루y
728x90

1. Product Overview

Name: MoistureSensor soil moisture sensor

Item No: SEN030003

Manufacturing: YwRobot


2. Technical Parameters

Size: 60 * 20mm

Weight: 4g

Voltage: 3.3V, 5V

Port: Analog voltage

Output voltage: 5V power supply, about 0-3.6V (3.6V voltage is completely immersed in water)

Output voltage values are for reference, because different water quality factors, see the actual measurement

Detection Area: 40 * 20mm

Detection surface: Gold-plated

Platform: Arduino


3. Product Feature

This module is a simple moisture sensor, use measuring changes in moisture and humidity resistance

The drier the soil, the output voltage is smaller. The more humid the larger output voltage

The module will be inserted into the soil, by the AD converter voltage signal can be detected in soil moisture

Can Arduino, pumps connected to form an automatic watering system

Immersion sensor technology, increased service life

Note: This sensor is a consumable, life is about 6-12 months (soil environment)


# 샘플소스

  // 토양 센서 처리 //////////////////////////
  int soilAnalogValue = analogRead(SOILSENSOR_PIN);
  int soilDigitalValue = map(soilAnalogValue, 0, 630, 0, 100); // Max(물에 잠길때) : 540 ~ 630, Min: 0
  soilDigitalValue = constrain(soilDigitalValue, 0, 100);
728x90
Posted by 하루y
728x90


(만능) 기판용(pitch2.5~2.54mm)은 pitch가 2.50mm 인 상품을 선택해야 함.

- Female:5264 / header: 5067, 5068(Right Angle)

- Female:5051 / header: 5045, 5046(Right Angle)

- Female:35312/ header: 35155


728x90
Posted by 하루y